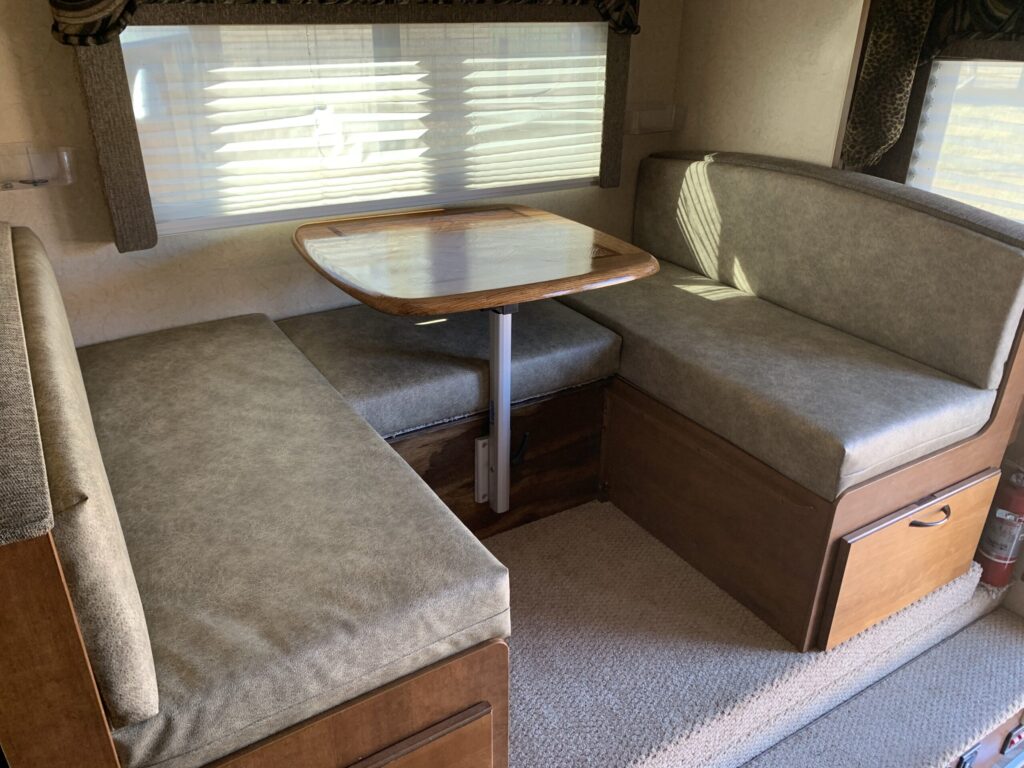
I got the hubby on board to remodel our new camper. Why does a “new” camper need remodeling? Well, we did buy it used, so it’s not really NEW. The dinette cushions were squished down and the seams were splitting apart. Either the prior owners were larger people than we are (and we aren’t small!) or they did a lot of sitting. The rest of the camper was perfect. It’s as though they just sat on the cushions all day and didn’t sleep, eat, or use the bathroom. Anyway, the dinette was uncomfortable. It was also impossible to keep clean with just one dog. The fabric was like dog hair velcro! Now we have TWO dogs, so we needed to do something to improve functionality, storage, give our couch-potato canines space to sprawl out, and the fabric needed to repel dog hair and dirt.
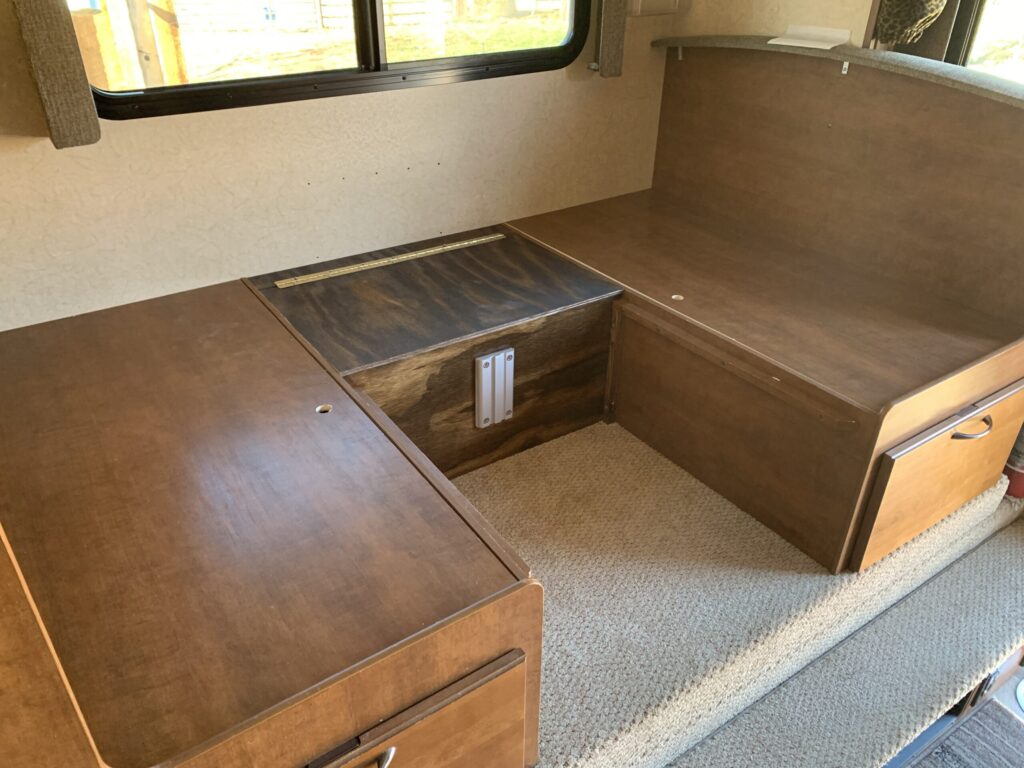
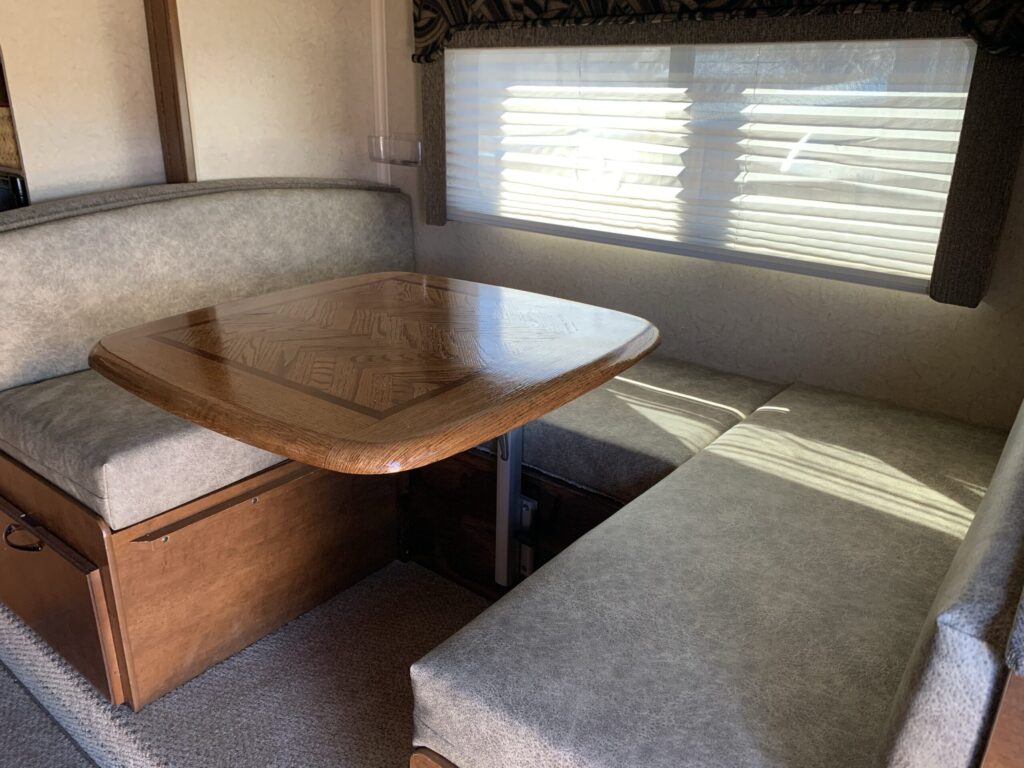
Our solution was to remove the “Dream Dinette” table and the big metal bracket on the wall. Are these dinettes really dreamy? We really have no intentions to sleep on the dinette – ever – or have houseguests sleep on it. But it may happen someday, so we needed to keep that functionality.
The hubby is pretty good with wood. Wood saws scare me. I have cut thousands of square feet of tile with a tile saw, but a table saw for wood just freaks me out. So he does the wood. I do other stuff. We compliment each other.
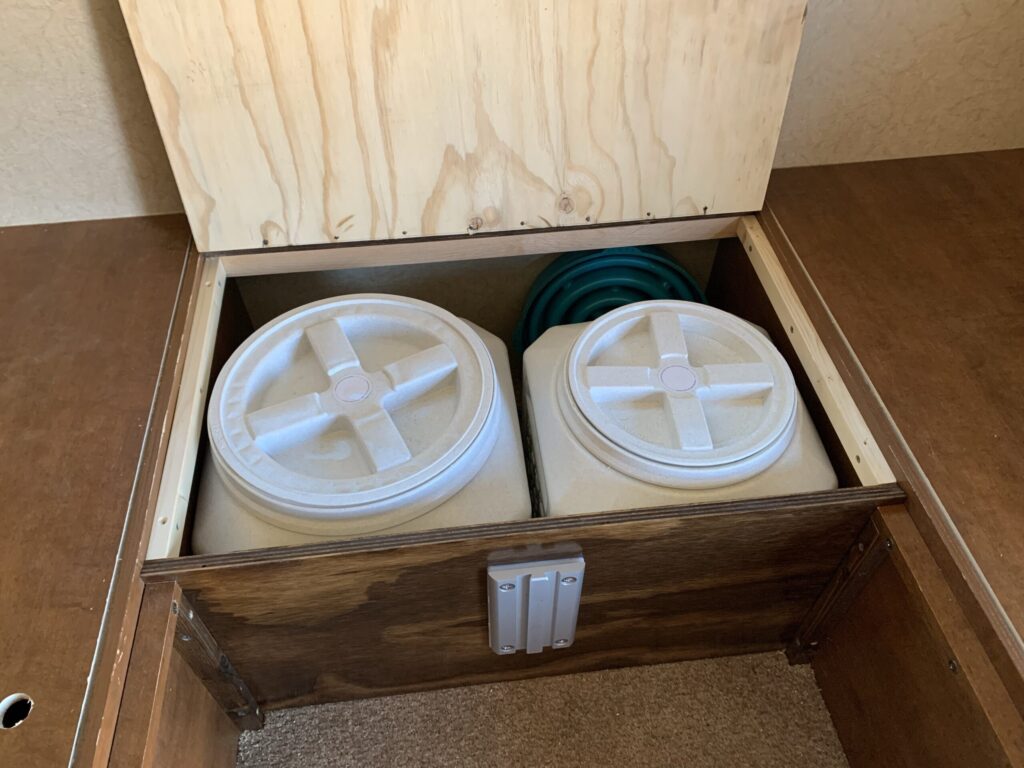
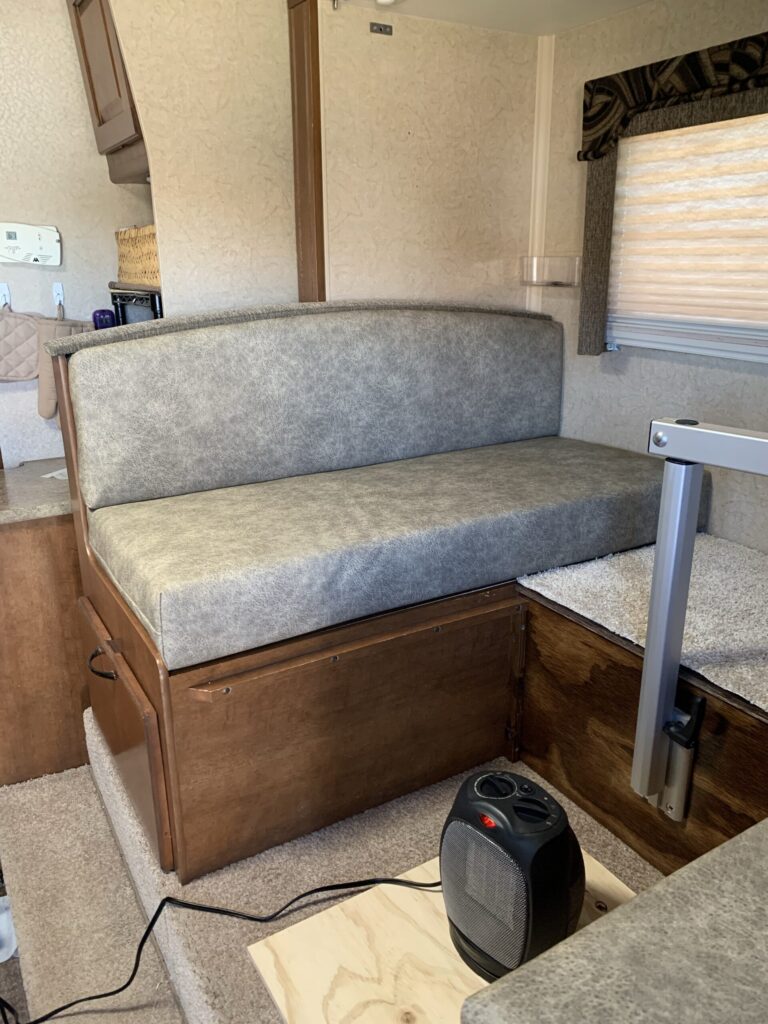
He built a storage box:
We actually designed the box so it was somewhat comfortable for a human butt, a dog to sprawl, and large enough to put dog food containers. We have been using this type of dog food storage at home for years, but these are smaller containers than the ones we keep in the garage. Two of the larger ones would not fit in the space between the dinette seats, so we ordered two:
Vittles Vault 30-Pound Stackable
Vittles Vault Outback 25 lb
I can tell you, if you decide to do this modification, these two containers fit perfectly between the dinette seats if you have at least 27″ of space between the two seats. There is just enough clearance for a piece of 1/2″ plywood to sit on 1″ cleats screwed to the bench and have the seat sit flush with the benches. We originally used 1/2″ plywood for the front, but there was too much flex for the weight of the table and mount, so we switched to 3/4″ ply. We also had trouble matching the stain to the original. It doesn’t really show, so it’s not a big deal.
As you can see, we purchased a Lagun table mount. Kudos to this company!! The mount came via FedEx. From GREAT BRITAIN. In ONE DAY. It was amazing! Packaging was great, the mount wasn’t terribly expensive, and I think it’s going to work great for us.
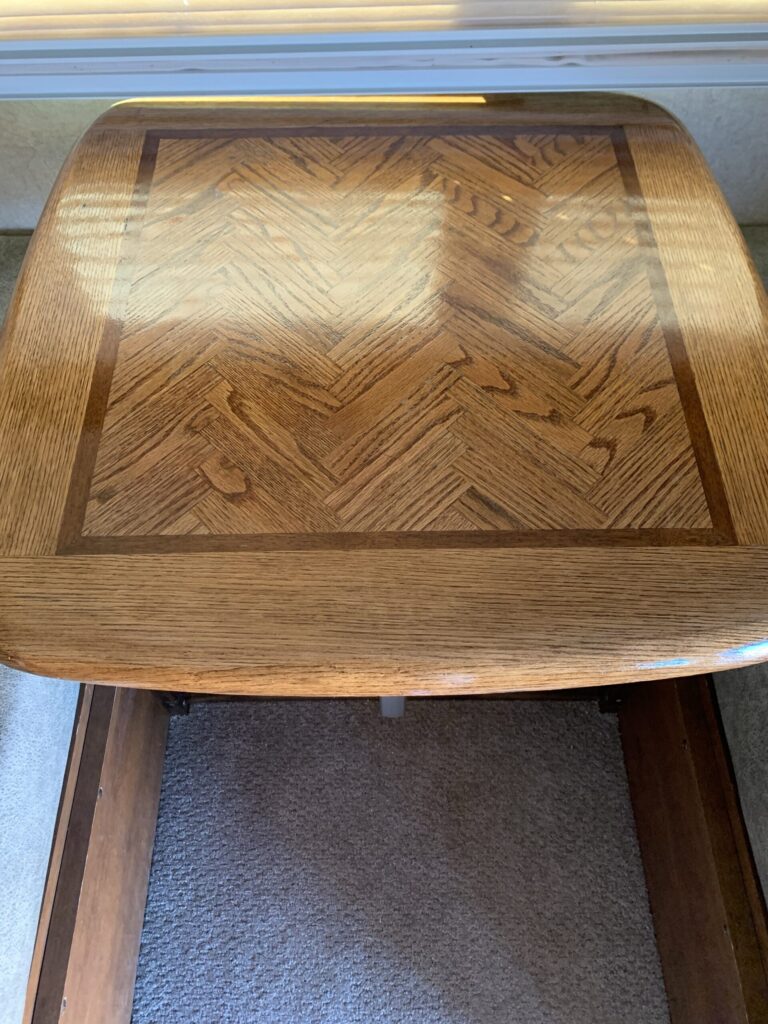
We searched everywhere online for a 27.5″ x 27.5″ tabletop. We’d pretty much resigned ourselves to building one ourselves, when we stopped at a local secondhand store and found an old end table. For $4. It was falling apart, there were some stains, but we didn’t care. All we wanted was the top and it really didn’t have to be perfect. I mean, we camp with dogs! So he disassembled it, sanded the finish and burn marks off, stained it, and put a lot of coats of polyurethane on it.
I mentioned the cushions and the upholstery. I decided to try my hand at redoing the cushions. I am AMAZED at how well they turned out. I watched a YouTube video from Sailrite and used their fabric calculator and instructions. It was surprisingly easy.
Here’s what I used:
The fabric is a vinyl from Joann. We took the original cushion cover to the store and did our best to find something that was close. Once the cushions were done, I was amazed that they matched so well. If you have a Lance camper with that color scheme from around 2014, you might want to try this fabric. I had a 50% coupon so it made it pretty affordable. It’s a soft vinyl, which you are supposed to be able to just wipe with a damp cloth to clean. We shall see how it holds up to dogs.
I had a sewing/embroidery machine, but I plan to make more heavier-duty things than Covid masks. Like denim dog beds out of old jeans. Someday. Maybe. Anyway, the machine was on sale at Walmart. They may still have them on the shelves at your local WalMart. Heavy Duty 44S Sewing Machine
I also got upholstery thread and needles at WalMart.
I got two different sizes of foam from Amazon. Since we are tall, I wanted a little bit thicker cushion for the seat than the back. Since we probably won’t ever make the dinette into a bed, this probably won’t be a big deal. If we do have to make it into a bed, I guess we’ll just apologize to our guest in advance and put the lower cushions at their feet? I also used the 4″ cushion for the top of the dog food area, mostly because I didn’t want to buy a small chunk of foam and I couldn’t find the 5″ in a roll longer than 96″.
The 5″ foam that I used for the seat is here:
FoamTouch Upholstery Foam Cushion High Density 5″ Height x 24″ Width x 96″ Length Made in USA
The 4″ foam that I used for the bench area and the back of the seats is here:
FoamTouch Upholstery Foam Cushion High Density 4″ Height x 30″ Width x 96″ Length Made in USA
I wrapped the foam with batting:
BayTrim Bonded Dacron Upholstery Grade Polyester Batting 48 Inch Wide. (10 Yards)
Which I glued on with spray adhesive.
I used bulk zipper. I don’t know what I’ll do with 40 yards or so of zipper that I have left over! Make pillows and bags, I guess?
Size 5 Nylon Coil Zippers with 50 Zipper Sliders (White, 1.2 In x 50 Yards)
The product that made these cushions fast and easy? Basting tape from Sailrite! What a FANTASTIC invention! NO pins, no hand basting! What??
Some links may be affiliate links. I may earn from qualifying purchases at no additional cost to you.
Minnie’s Mommy is a participant in the Amazon Services LLC Associates Program, an affiliate advertising program designed to provide a means for sites to earn advertising fees by advertising and linking to Amazon.com.
Minnie’s Mommy is a participant in the Wal-Mart.com USA, LLC Affiliate Marketing Program, an affiliate advertising program designed to provide a means for sites to earn advertising fees by advertising and linking to walmart.com.
